Signs of Vascular Occlusion After Filler: Early Red Flags
11 September 2025
In this post:
- Vascular occlusion occurs when dermal filler blocks or compresses a blood vessel, and it can cause serious complications if not recognised quickly.
- The five early warning signs include disproportionate pain, blanching or pallor, abnormal capillary refill, livedo reticularis, and progressive post-procedural pain.
- Distinguishing vascular occlusion from normal post-treatment changes such as bruising or temporary blanching is essential for accurate diagnosis.
- Effective management involves prompt use of hyaluronidase, referral when necessary, and prevention through advanced training and the use of facial ultrasound.
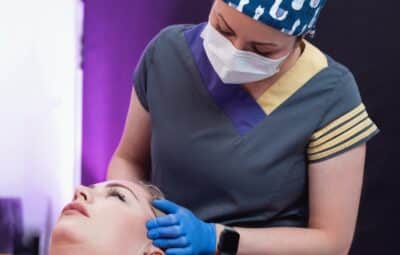
It’s a scenario that no injector ever wants to experience. You’ve just finished treating a patient’s lips with dermal filler. The procedure went smoothly, no obvious complications, and your patient seems comfortable. But flash forward thirty minutes, and they’re back at your door with blanching skin, severe throbbing pain, and a dusky discolouration spreading across their lower lip.
What was supposed to be a routine treatment has become a medical emergency that could result in permanent tissue necrosis if not addressed immediately. Situations like this play out more frequently than most injectors realise.
While vascular occlusions are rare, the rising number of aesthetic injection treatments means every practitioner will likely encounter it at some point during their career. The difference between a good outcome and permanent scarring often comes down to one critical factor: how quickly you recognise the warning signs.
What is Vascular Occlusion After Filler?
Vascular occlusion occurs when dermal filler blocks or compresses a blood vessel, cutting off oxygen to the surrounding tissue. This can happen through direct intravascular injection, where filler enters the bloodstream, or through external compression, when filler placed outside a vessel creates enough pressure to restrict blood flow.
The mechanism might seem straightforward, but the consequences are anything but simple. When blood flow is compromised, tissues begin to suffer from ischaemia within mere minutes. Without immediate intervention, this progresses to irreversible tissue death (necrosis), permanent scarring, and in worst-case scenarios, filler blindness when the ophthalmic artery is involved.
The critical window for intervention is typically 24-48 hours, though earlier recognition and treatment dramatically improves outcomes. As Dr MJ Rowland-Warmann, founder of the Smileworks Aesthetic Training HUB, emphasises: ‘Swift recognition and management is key. More often than not it will be a bruise, but if it is indeed a vascular occlusion, time is tissue.’
The 5 Early Signs of Vascular Occlusion After Filler
1. Pain During or Immediately After Injection
Not all injection pain is created equal. It’s normal for every filler treatment to involve some level of discomfort, but vascular occlusion often presents with distinctly different pain characteristics that experienced injectors learn to recognise.
Normal injection pain is brief, localised to the needle entry point, and proportionate to the area being treated. Concerning pain, however, is disproportionate to what you’d expect from that particular injection site. If a patient suddenly experiences significantly more pain from one injection compared to others in the same treatment session, this should trigger immediate assessment.
Dr MJ’s guidance is clear: ‘Stop injecting if you feel an injection is hurting differently to others you have administered on the same patient.’ This isn’t about being overly cautious; it’s about recognising that severe, sudden pain can be the body’s first warning that blood flow has been compromised.
Post-procedural pain that builds and throbs, requiring strong painkillers to manage, is another red flag. While mild discomfort is normal after filler treatments, escalating pain warrants immediate evaluation.
2. Blanching and Pallor
Blanching, the sudden whitening of tissue due to restricted blood flow, is often the first visible sign of vascular occlusion. This ‘flash’ of white may appear immediately upon injection or develop within the minutes after treatment completion.
The challenge then lies in distinguishing pathological blanching from normal, temporary changes. It’s perfectly common to see some pallor immediately after injecting lidocaine anaesthetic, and patients may experience temporary blotchiness during the procedure itself. The key difference is duration and quality.
Normal blanching maintains some capillary refill when tested, and the tissue regains colour within two seconds of compression and release.
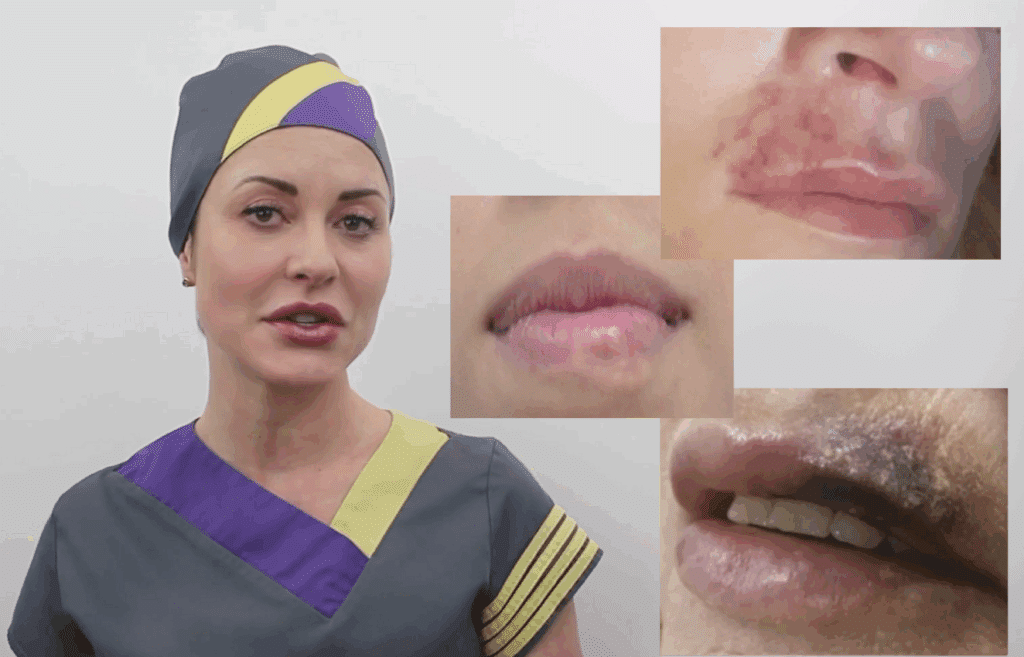
Pathological blanching from a vascular occlusion shows little to no capillary refill and may be accompanied by a greyish, dusky appearance rather than simple paleness.
This distinction becomes more challenging in patients with darker skin tones, where subtle colour changes may be harder to detect. In these cases, tactile assessment (checking for temperature changes and capillary refill) becomes even more critical.
3. Abnormal Capillary Refill Time
Capillary refill testing is perhaps the most reliable early indicator of vascular compromise that every injector should master. This simple bedside test can differentiate between normal post-treatment changes and serious vascular occlusion within minutes of onset.
Here’s Dr MJ’s systematic approach to capillary refill testing, a preview into our renowned Advanced Facial Ultrasound Course:
To perform the test correctly, apply firm pressure to the suspected area using your finger or a flat object for exactly five seconds, then release and observe the time it takes for normal colour to return. Normal capillary refill should occur within 2-3 seconds in patients under 65, and up to 4 seconds in elderly patients.
The critical element here is bilateral comparison. Always test both treated and untreated sides. Significant differences in refill time between sides are more indicative of perfusion problems than absolute numbers. A refill time greater than 3 seconds on the affected side, especially when compared to a normal contralateral side, suggests compromised blood supply.
It’s essential to establish baseline capillary refill before starting treatment when possible. This gives you a reference point for that individual patient, as some people naturally have slower refill times due to conditions like Raynaud’s phenomenon or simply cooler treatment room temperatures.
4. Livedo Reticularis (Net-like Pattern)
Livedo reticularis appears as a distinctive net-like or lacy pattern of purple-red discolouration that follows the natural branching pattern of blood vessels. This mottled appearance typically develops 15-30 minutes after treatment and indicates disruption in blood drainage from the skin.
What makes this pattern particularly concerning is its geographic distribution. Unlike localised bruising, livedo reticularis follows the territory of the affected vessel, creating a branching pattern that extends beyond the immediate injection site. This ‘tree branch’ appearance reflects the underlying vascular anatomy and indicates a larger area of compromised circulation.
The timing is crucial for diagnosis. While normal post-treatment blotchiness appears within minutes and resolves quickly, livedo reticularis develops gradually and persists or worsens over time. Patients who develop this pattern should be seen immediately, as it often indicates more extensive vascular compromise than simple localised blanching.
5. Progressive Post-Procedural Pain
While some discomfort is expected after filler treatments, the pattern and progression of pain can provide crucial diagnostic information. Normal post-treatment pain is described as mild aching or soreness that gradually improves with standard over-the-counter pain relief.
Concerning pain, however, has different characteristics entirely. Patients often describe it as throbbing, burning, or severe aching that progressively worsens rather than improves. They may report that the pain is keeping them awake or requires prescription pain medication to manage. This is all far beyond what you’d expect from routine filler placement.
Educating your patients is of the utmost importance here. Before patients leave your practice, ensure they understand the difference between normal healing discomfort and the warning signs that require immediate attention. Dr MJ emphasises, ‘Make sure they have their aftercare advice and an emergency number just in case.’
Distinguishing Vascular Occlusion from Normal Treatment Responses
As we’ve discussed, one of the most challenging aspects of recognising vascular occlusion is differentiating it from natural post-treatment changes that commonly occur. Bruising, in particular, can cause significant anxiety for both practitioners and patients.
Here’s Dr MJ’s systematic approach to differential diagnosis:
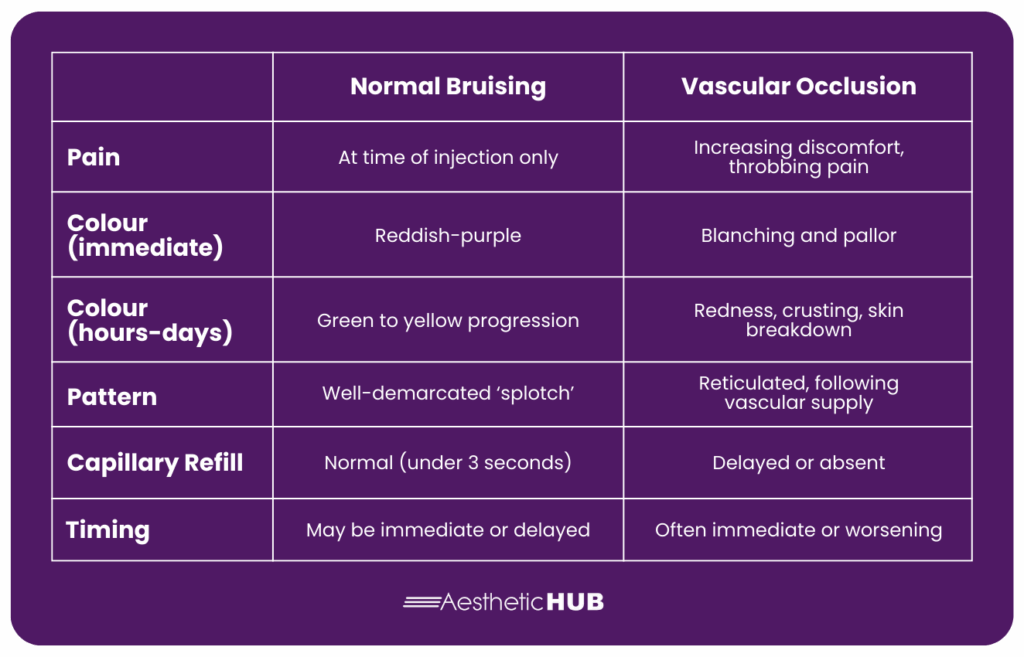
Normal bruising appears as well-demarcated areas of discolouration that may ‘slip’ due to gravity. For example, a bruise created at the corner of the lip may appear lower at the marionette line hours later. These bruises follow tissue planes and are contained within anatomical bruising.
On the other hand, vascular occlusion follows vascular territories and creates the characteristic branching or net-like patterns. The affected area may extend well beyond your treatment sites, following the path of the compromised vessel.
The capillary refill test remains the most reliable distinguishing factor. Bruised tissue maintains normal capillary refill, while areas of vascular occlusion show delayed or absent refill when tested bilaterally.
Emergency Response Protocol
When you suspect vascular occlusion, every minute counts. Your immediate response can mean the difference between complete resolution and permanent complications.
Immediate Assessment
- Stop all injection activity immediately
- Perform bilateral capillary refill testing
- Document findings with photos if possible
- Assess pain levels and patient comfort
Emergency Treatment
Hyaluronidase remains the gold standard for emergency filler dissolution. The ACE guidelines recommend you can perform up to four cycles of emergency dissolving, spaced one hour apart, with heat and massage between treatments. Mix one vial of hyaluronidase with 2ml of saline, aiming to reduce pain and normalise capillary refill.
Most occlusions resolve with 1-2 vials of hyaluronidase, but don’t hesitate to use additional vials if needed within the guideline limits. The key is precise placement. Inject the hyaluronidase directly into the area of suspected occlusion, not randomly around the treatment site. Facial ultrasound is incredibly helpful with this process, if not a necessity.
When to Refer
If four rounds of hyaluronidase fail to resolve the occlusion, you’re likely dealing with a refractory case where the dermal filler may have migrated from the injection site. At this point, refer to a specialist who has access to advanced treatments like hyperbaric oxygen or facial ultrasound. Here at the HUB, we have two world-renowned courses on facial ultrasound, and we believe this skillset is an absolute must for any injector. More on that in the next section.

Prevention Through Proper Training
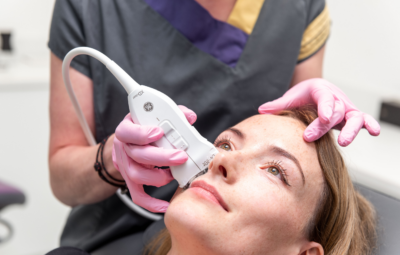
The sheer complexity of recognising vascular occlusion and the serious nature of the potential complications highlight just why comprehensive aesthetic training isn’t just beneficial – it’s essential for patient safety. Understanding facial anatomy through static diagrams is one thing, but visualising it in real time transforms your practice entirely.
At the Smileworks Aesthetic Training HUB, we prepare practitioners for these complex scenarios through comprehensive facial ultrasound training.
Our Foundation Facial Ultrasound Course and our Advanced Facial Ultrasound Course take the guesswork away, allowing you to visualise beneath the skin and understand structures in an entirely new light. When you see anatomy in real time, you’re able to prevent and treat vascular occlusions much more effectively. Facial ultrasound is the single most important tool for any injector.
The future of aesthetic medicine demands practitioners who understand clinical excellence and professional compliance. Our online Essential Practice course covers everything you need to know about running a practice outside of clinical injecting. This includes advertising regulations and more. This course is designed to make sure you’re prepared for each and every aspect of this industry, something that other aesthetic courses lack.
If you’re still a beginner aesthetic injector, our Foundation Botox & Lip Filler course lays the perfect foundations for aesthetic injecting. All of our courses start with online, theoretical learning so you can come to our hands-on day equipped to start injecting.
For those looking for more in-depth training, we recommend booking a one-to-one mentoring session with Dr MJ. These sessions are 100% customisable, and you’ll receive personalised instruction based on your skill level and goals.
Join us at the HUB today. Let’s shape the future of aesthetic medicine together and ensure safe, effective, and transformative results for every patient.
Want to try out our courses before committing? Take advantage of our free trial for a taste of what learning at the HUB is like.
Related blog posts:
Remarkable Aesthetics Courses
Advanced Facial Ultrasound
Explore more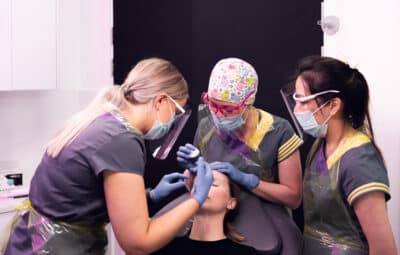
One-to-One Mentoring
Explore more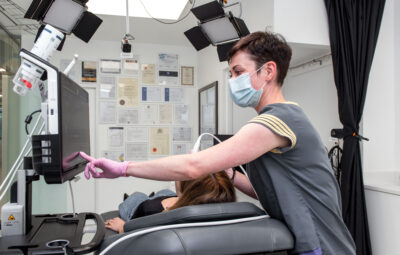
Facial Ultrasound
Explore more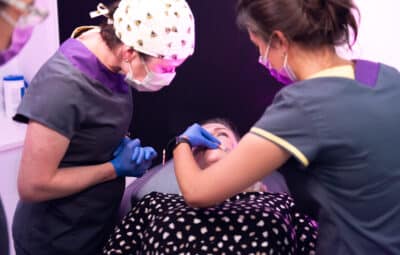
Lip Filler
Explore more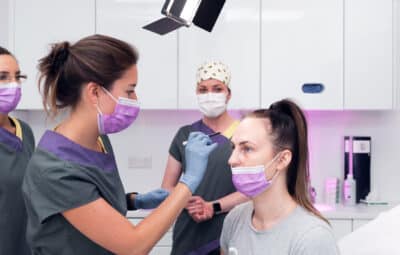
Botox
Explore more