Prevent & Manage Filler Complications with Ultrasound Guided Injections
Dr MJ Rowland-Warmann | 25 July 2023
Join Dr. MJ Rowland-Warmann in an enlightening exploration of how ultrasound technology is revolutionising the aesthetics industry, particularly in managing and preventing filler complications. Learn how ultrasound, a simple yet powerful tool, can enhance your confidence, ensure your patients’ safety, and improve your practice’s success. This webinar will provide practical solutions for the most complex filler complications, including misplaced forehead filler. Don’t miss out on this opportunity to revolutionise your practice and join us till the end for an exclusive discount on comprehensive online Ultrasound Training. Embrace the future of aesthetics – where safety, efficacy, and confidence converge.
NOTE: DISCOUNT MENTIONED IN WEBINAR EXPIRED ON 13 JUNE 2023.
WEBINAR TRANSCRIPT
I am a dentist based in the UK where people love aesthetic treatments. Our industry is unregulated and anyone can legally inject. And that means I see a whole host of complications ranging from mild to really severe – from a few lumps and bumps to visual disturbances. And that has created a need for complication management clinics on a regular basis within my practice, where I take referrals for problems people have with filler.
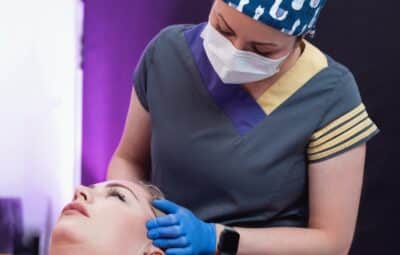
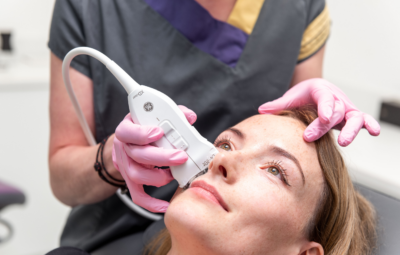
I’ve been using ultrasound in practice for around 2 years now and I’m not kidding when I say it might be the best money I’ve ever spent. But let’s not waste time singing its praises, I’m just going to go ahead and show you how great it is.
We can use ultrasound in aesthetics for a whole host of different indications. Using it in filler treatment is a godsend – whether that be before treatment to vascular map, during treatment to place filler using ultrasound guidance or after treatment to confirm placement, is key to predictable outcomes. We can check up on our filler over time, decide what’s hidden in our patient’s faces if we come across historic filler and we can learn a huge amount of anatomy using it on our patients in daily practice.
But one major use is in dermal filler complications. Diagnosing and managing complications has arguably taken a giant leap forward since ultrasound.
Being able to see beneath the surface of the skin to identify problems from filler is revolutionary.
Gone are the days when we’re left guessing what the problem is, or where it is. Now, this simple two minute diagnostic can help us resolve problems swiftly and effectively. Patients endure fewer interventions, less delays in diagnosing the problem, and the complication can often be found and fixed in the same session.
That’s pretty wonderful.
So complication management with ultrasound is what I am going to be talking to you about today.
Specifically we’re going to be talking misplaced filler. If you are a patient looking to have filler dissolved, please visit the Smileworks dissolving filler page.
So, what is misplaced filler.
Well, simply: filler where it shouldn’t be.
This paper from way back in 2013 split complications into immediate and delayed.
Misplacement of filler happens at the time of treatment, so it’s immediate. It’s in the incorrect place or plane, or adjacent a structure which it interferes with. Over time, errors in placement can also cause product spread, or migration, due to the tissue movement. So it also has delayed consequences.
The issue with a lot of misplaced filler is that it’s just being left. Practitioners don’t see it as serious enough to warrant intervention, and patients often don’t experience problems severe enough to seek assistance. They’re often told the symptoms will pass, and feel they’re being overly sensitive or whingy if they counter this.
But actually, this is the most common complication there is in aesthetics.
It’s the one that causes such a huge amount of anguish for patients being left disfigured sometimes for years. It causes the most amount of negative press for our industry – all these ugly results out there are simply bad for business.
So, you should not just stand by and let them suffer.
I’ve chosen two misplaced filler cases today simply because this complication is ubiquitous. You will see it daily. And with your ultrasound, you have the ability to bring about a swift and effective resolution.
I know there are bigger, scarier complications out there – like vascular occlusions or infections. But I wanted to give you something in this webinar that you can tackle very soon after starting out with ultrasound. Identifying and eliminating the most common problem. That way, you can build your skills and work towards more challenging problems that will, undoubtedly, come your way.
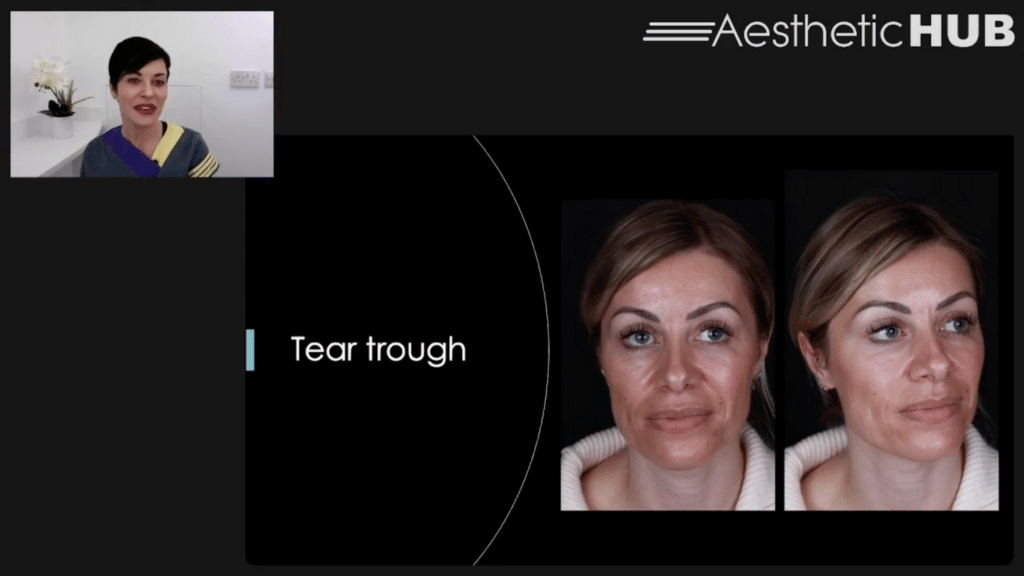
This is our first case for today.
You might think she doesn’t look too bad. But if you look closely you can see the puffiness under the eyes.
She presented with bilateral infraorbital swellings, which have been there since she had tear trough filler 18 months ago. They’re not painful, they don’t fluctuate. But they’re unaesthetic.
She was told by her injector the filler has gone after this time. But as we know from recent studies like the 2021 by Mobin Master, filler sticks around for years, if not decades.
So, this is a classic case of an immediate complication not being handled and turning up delayed.
Let’s take a look at this case in more detail.
Before we talk about diagnosis and management of this problem, we need to familiarise ourselves with the treatment area and understand what’s normal. And to do that we’re going to use ultrasound.
Let’s take a look at the layers we expect to see.
This is the area of the lateral orbit. We see the skin and the subcutaneous fat here is thin. Under the orbicularis oculi muscle is the lateral SOOF and finally bone.
As we move along to the medial aspect of the tear trough there’s just three layers: skin, orbicularis and bone. The tissue is a lot thinner.
There’s a few vessels we need to be aware of in the area around the tear trough.
We must be mindful of the infraorbital foramen, which is around 10mm inferior to the orbital rim medial to the mid-pupillary line. The infraorbital artery, vein and nerve exit here
But we also have the angular vein.
This is 4mm inferior to the orbital rim within the orbicularis oculi. At the midpupillary line it’s around 4mm away from the periosteum but can be as close as 1.5mm to the bone in the medial tear trough.
So the safe space for tear trough filler gets less and less lateral to medial. There’s very little room and there’s a risk of injuring the angular vein. The angular artery is more medial to the vein so it’s a more protected. That’s the findings from this paper from 2022.
Let’s talk tear trough boundaries.
The SOOF is bounded inferiorly by the zygomatico-cutaneous ligament and superiorly the orbicularis retaining ligament. Deep is the bone and superficial is the orbicularis oculi muscle. This is where our filler should go in tear trough augmentation.
Placement of filler superficial, so over the muscle, will result in oedema. And if product is placed through the orbicularis retaining ligament the patient will end up with significant bags, or even compromise to the inferior palpebral arteries in the eyelids. Too medial – and you’re into vessels.
Filler treatment to the tear trough is tight and it’s technically demanding.
And that’s part of the reason why botched tear trough filler are in the top 3 types of complications I see.
In addition to placing it right, the right product needs to be chosen. One that isn’t hygroscopic and draws in tonnes of water. Then we’ve got to select the patient correctly – a trough can be treated, a bag is more difficult due to pre-existing fat pad herniation and tendency for oedema.
So, it can be fraught with difficulty.
This systematic review by Trinh from 2022 showed that most common delayed complications in the tear trough were swelling (42.3%), nodules/lumps (25%) and migration also featured at 7.7%. And it’s overwhelmingly HA filler causing these issues.
So if our patient is presenting with oedema, even before scanning we can have a good guess as to what we might see with our ultrasound,
It might be too much filler for the small space under the orbicularis, placement of filler behind the orbital septum, wrong case selection such as patients with bags rather than troughs, superficial placement of filler, wrong filler type, or filler irritation of vessels causing hypervascularity and oedema, and this is something I’ll discuss in just a moment.
Let’s take a look at our patient with the complication now. We expect to see some rogue filler somewhere.
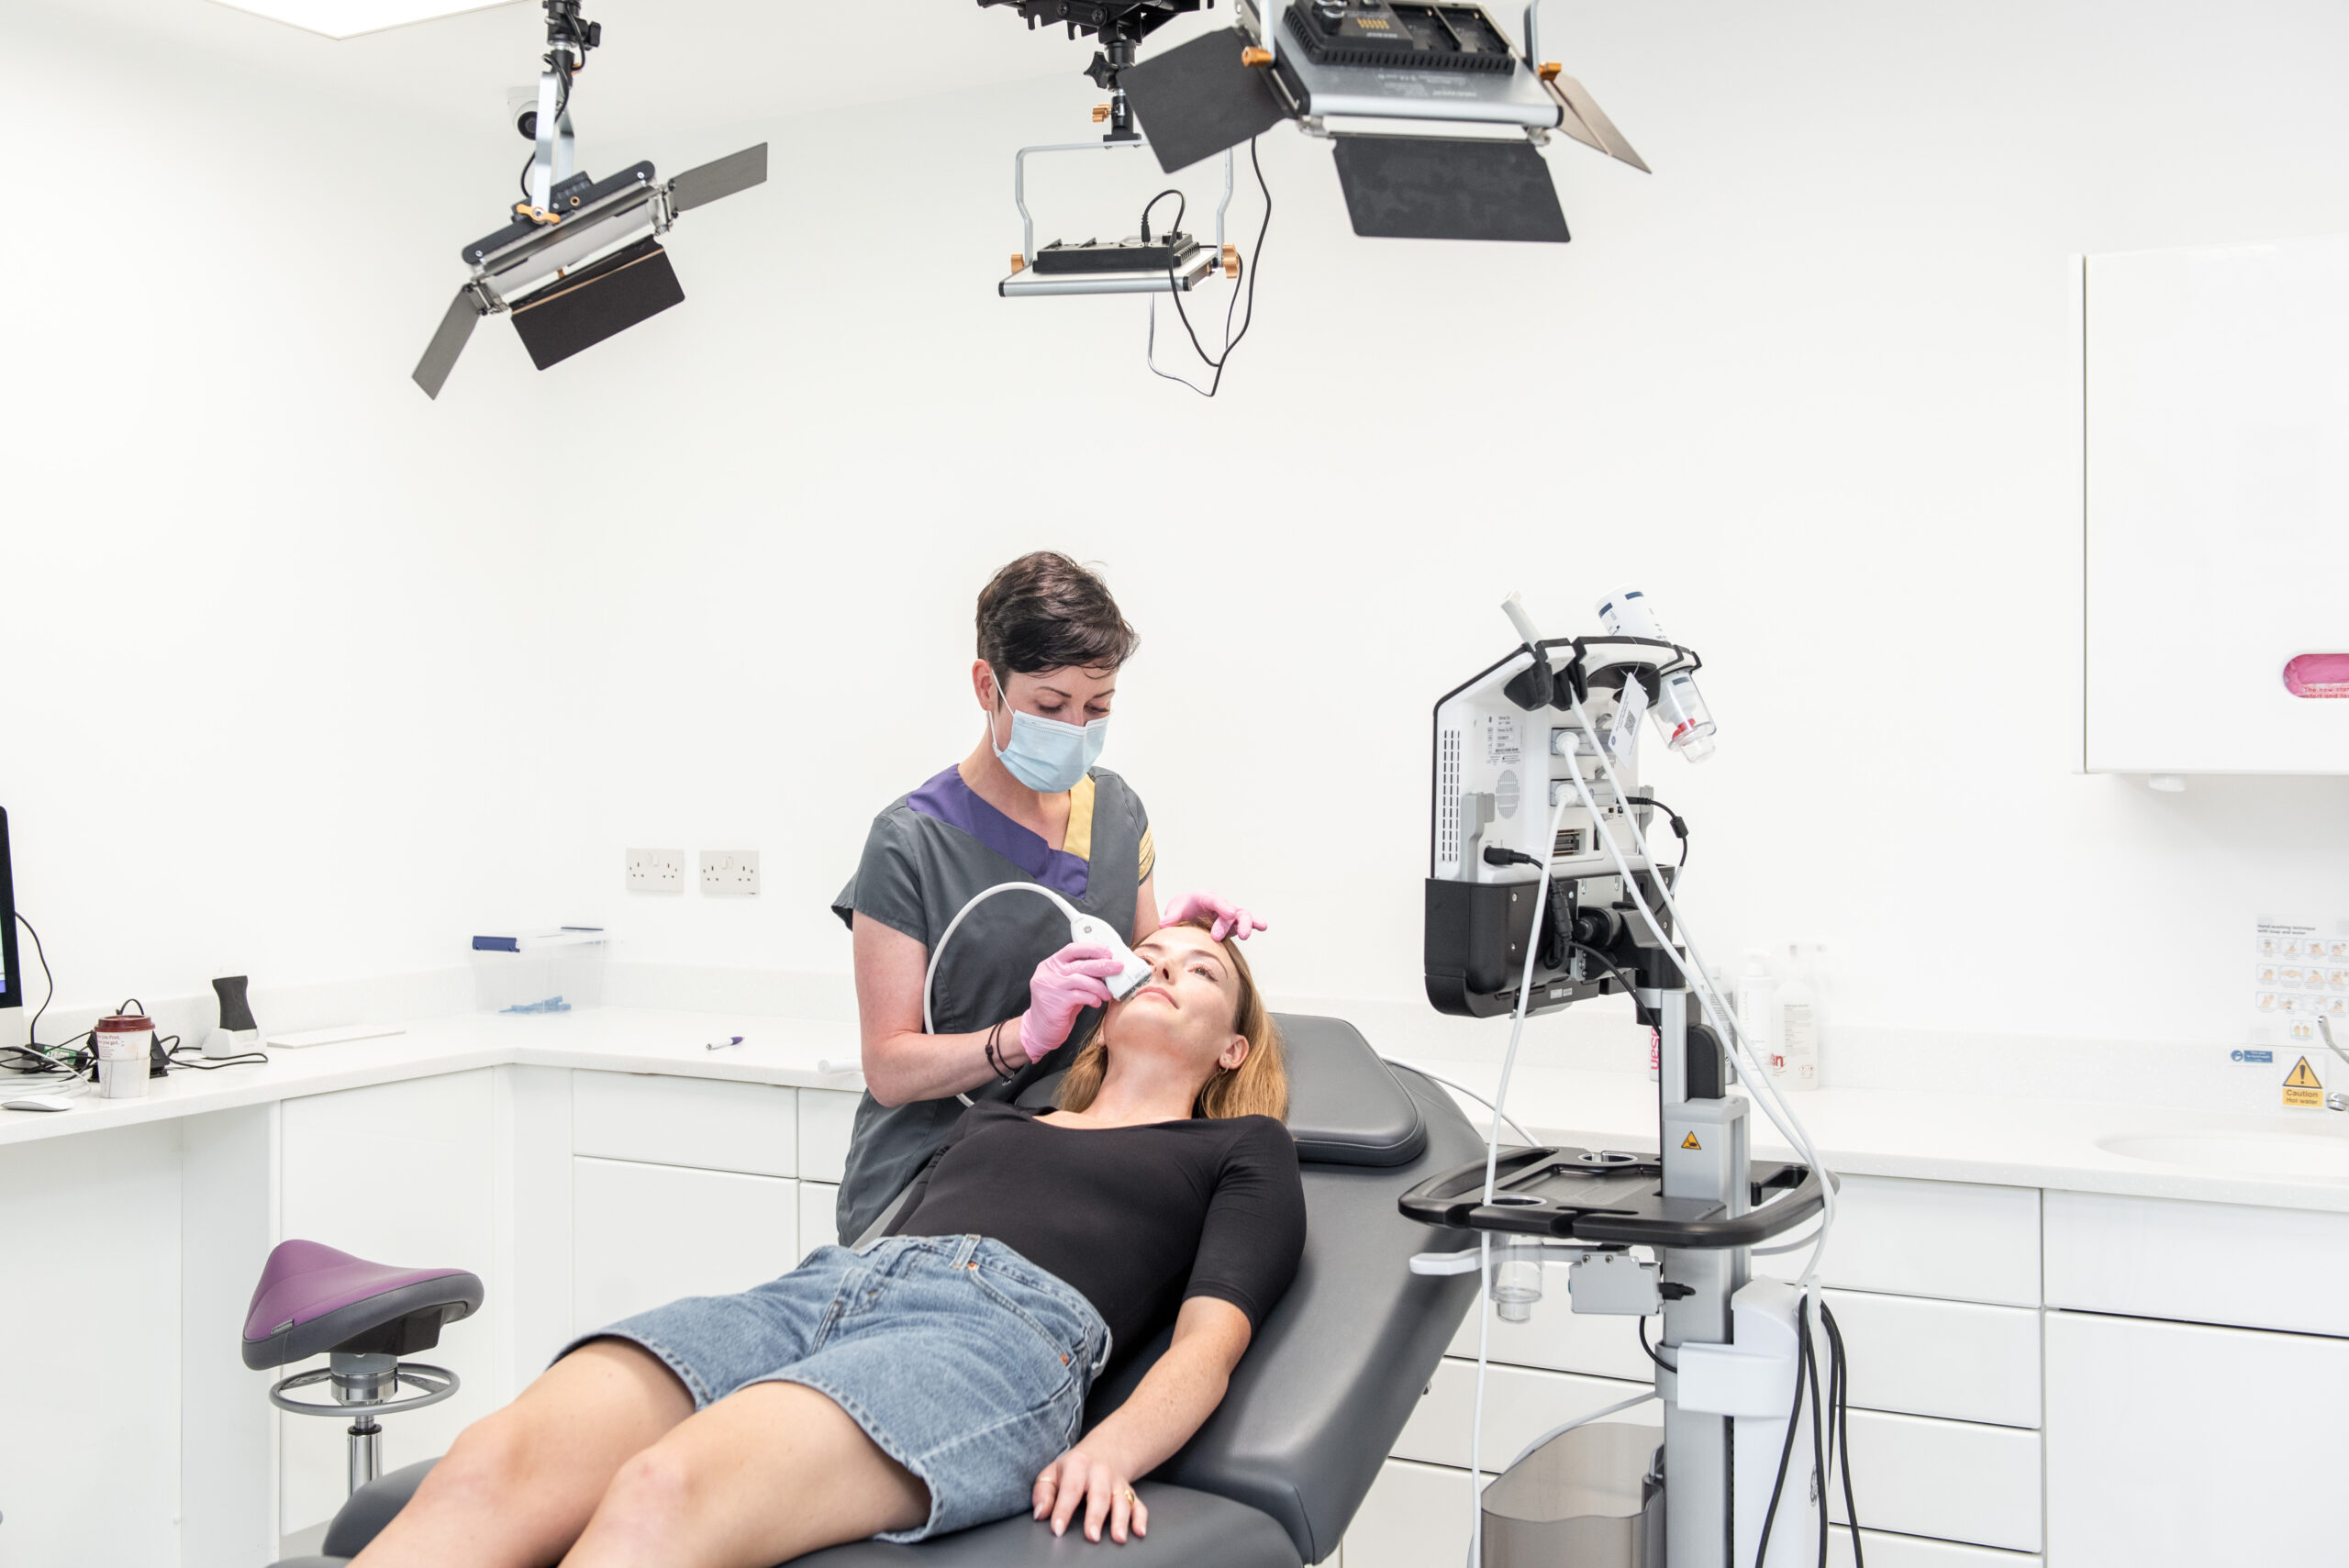
Here I’m scanning the right infraorbital area with the centre of the probe at about the mid pupillary line and we can see, hyperechoic skin, isoechoic subcutaneous fat, hypoechoic muscle, isoechoic SOOF, and hyperechoic bone.
As I move the probe an anechoic round deposit comes into view. Anechoic means it appears dark on ultrasound because it doesn’t reflect sound waves back. That means it’s either fluid filled like a vessel or a deposit of HA filler.
We can go ahead and check whether it’s a vessel by turning on doppler mode and moving our colour box.
Vessels come up as coloured flashes and you can see the black deposit remains dark. So this tells me that it’s HA filler and it appears to be under the orbicularis.
The flashing vessel at the bottom of the screen is the infraorbital artery which you can see coming out of the infraorbital foramen. This is the hyperechoic structure that can be seen at the middle lower part of the screen.
Interestingly there are quite a lot of flashes of vessels in this area too around where the filler has been placed.
What often happens when filler is in close proximity to vessels is a phenomenon called hypervascularity. Filler is noxious – irritant to vessels. It can cause them to proliferate and what we see on ultrasound is lots of vessels in an area around filler. This has been described by Schelke and others in their 2019 paper.
They showed case of hypervascularity in the lip in this paper, but it is seen in many areas of the face and especially in the tear trough. Where filler is placed close by vessels there will inevitably be a response by the vessel. This response causes the symptoms of oedema like in our patient. So – filler next to vessels causes hypervascularity and oedema – and what we see clinically is swelling, even if the filler appears to be in the right plane under the muscle.
This might be exacerbated by the type of filler that has been used – filler which is too hygroscopic can cause additional pressure and swelling, compounding the problem.
Once the filler has been identified, I can dissolve it.
I use so-called in-plane technique where my needle is in line with the probe and I can see the needle advancing on the screen to get to the filler. This is the easiest way of visualising the needle and allows you to see its path and correct it with tiny movements.
Once I’m at the filler, I go ahead and place hyaluronidase
I’m going to treat this deposit again with another dose. The filler treated just now has changed and taken on this cotton wool like appearance.
This is very typical of filler after hyaluronidase and is due to the change in rheology affecting sound wave reflection.
It’s taken two tiny doses – no more than between 30-45 units per deposit. I work with a 5ml dilution on 1500 units for this so 0.1ml is 30 units. I find this is the ideal concentration for aesthetic correction.
Here’s the treatment area immediately after the intervention with hyaluronidase. We can see the blood vessels are quite agitated – and that’s normal considering they have just been injected near.
Turning off doppler, we can see this cotton-wool like appearance again. This tells me my job here is done, the filler’s on its way out, I can send my patient home and review her in a couple of weeks.
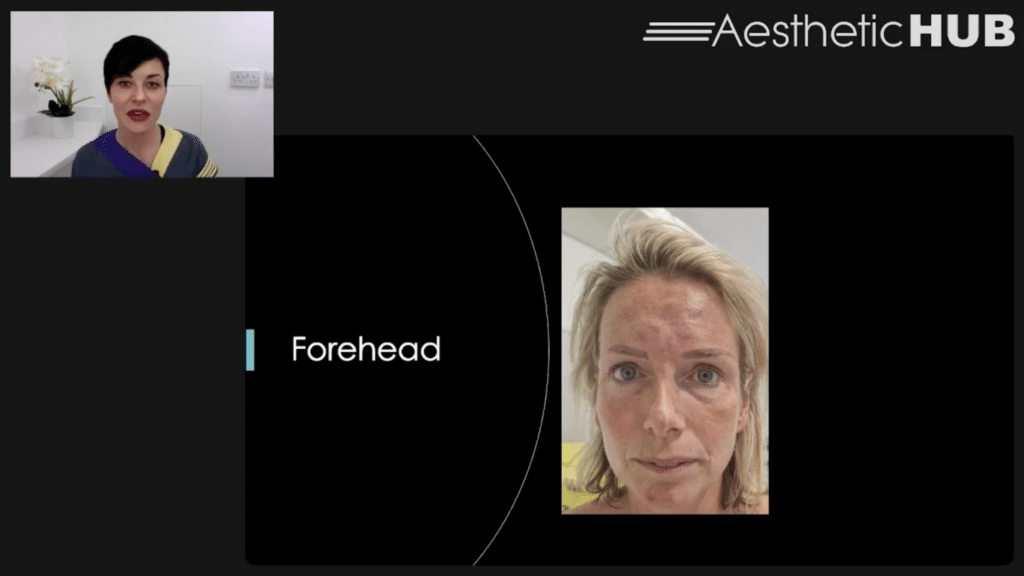
This is our second patient. She, too, is a delayed complication.
She’d had forehead filler by an unlicensed practitioner who had injected her over the central part of the forehead. This picture was taken on the day of treatment. She doesn’t look like she’s having a good time.
Immediately after the treatment, she experienced severe headaches, swelling, redness and significant pain. So much so, she was out of work incapacitated for some time. She didn’t have any skin changes, so her practitioner didn’t take her seriously.
She eventually convinced the initial practitioner to see her, who attempted dissolution once and told her that’s all that could be done, because she didn’t see a problem.
This is her 8 weeks after her filler treatment, on the day she presented to me. You can see that there is an area of swelling at the glabella. This lumpy swelling extends all the way up into the forehead to the hairline to the right of the midline.
At this stage she was experiencing persistent headaches, diffuse swelling and tenderness to touch the area. She’d had the complication for two months and the psychological impact was obvious. She was frustrated, tearful and frightened.
And this is how many patients present with complications – they’re at the end of their tether. And they need delicate management. So being able to use ultrasound to tell them exactly what’s going on is crucial to rebuild them emotionally and their trust in aesthetic professionals.
Many injectors don’t treat the forehead with filler out of fear of the risks. In their 2019 update on avoiding and treating blindness from fillers, Beleznay and colleagues found that, whilst the nose was number 1 site for vision loss from filler at 56.3%, the glabella at 27.1% and forehead at 18.8% were the second and third most risky areas for filler treatment.
The supraorbital and supratrochlear artery are terminal branches of the ophthalmic. Introduction of filler to either, or even the superficial temporal artery which anastomoses with them, can lead to filler reaching the eye and resulting in vision loss.
According to a study by Agorgianitis in 2020, the average depth of the main forehead arteries is 1.5mm with a diameter of 1mm. It is expected that the supratrochlear artery courses 1-2cm lateral to the midline and the supraorbital 2-4cm. However, their course is highly variable and may have a plethora of branching patterns. So, the only way you can predictably reduce risk when treating these areas with filler is to use ultrasound to identify vessels.
When scanning the forehead we expect to see most of the layers, including hyperechoic skin, isoechoic subcutaneous fat, hypoechoic frontalis, which can be seen as an indistinct band in the middle layer – the frontalis isn’t as easily identifiable as some muscles in other parts of the face. Then there’s the hyperechoic subfrontalis fascia, a layer of loose areolar tissue, and hyperechoic periosteum and bone.
You may have been a little confused about what is going on beneath the periosteum in the forehead.
The periosteum is the deepest surface and sound waves don’t pass through, so there is nothing beneath this layer. However, on your image you might get some extra lines beneath the solid white line of the periosteum which can be confusing.
This is a mirror artefact. This happens when the transmitted soundwaves bounce off a highly reflective interface – a so-called acoustic mirror. In this case, it’s the frontal bone.
They return to the transducer and result in a signal and image that can be very similar in shape to the structure they have been reflected off. In the forehead the mirror artifact is often weaker and can be seen as these lines beneath the level of the bone.
Let’s do some scanning, first in B mode. I’ve marked out in red pen the swollen and tender area to reference my scanning. Immediately we can see round, anechoic deposits which I suspect to be filler.
It could be a vessel – they come up anechoic, but it’s a bit big for that.
Moving cranially in the central forehead you can see the extent of the filler
There is a lot.
And further up still there are more deposits at varying depths and they’re sizeable and spread over much of the central part of the forehead.
Looking at the scale on the right some measures around 2 by 5mm.
Let’s switch to doppler and reconcile these findings with the vascular anatomy. There’s no coloured flashes here which means all of this is filler in the glabella.
So here it gets interesting. We’re in the glabella at the Supratrochlear. Agorgianitis described the supratrochlear passing superficial to the corrugator and deep to orbicularis and frontalis muscles with an extremely variable course with many branches.
Advancing cranially we see the supratrochlear come closer to the skin and again we have a large filler deposit very close by.
This is the area she described as painful. There’s a large filler deposit close to a branch of the supratrochlear artery. As described by Schelke in their 2019 study I shared earlier, filler can irritate vessels. This can result in oedema and pain, because there’s no room to expand.
A further consequence may be activation of choke anastomoses resulting in ischaemia of the forehead. This can be delayed due to irritation by filler. So, seeing filler this close to the vessel is really concerning.
Now that I’ve identified the filler, I can go ahead and get rid of it.
Key to this is getting a good position so you can visualise the needle. The forehead is only around 4mm thick so you’ve not got much margin for error before you’re onto bone.
My positioning is in-plane, so the longitudinal axis of the footplate is in line with the needle.
You can see my needle coming in on the left of the screen towards that central filler deposit.
I deposit only a small amount of hyaluronidase as it is precisely targeted – again, no more than 0.1ml
This case is more tricky, as there are multiple sites of filler which could be causing the problem. This pulsating vessel is likely the supraorbital. Placing hyaluronidase here can cause vessel injury and she did end up with bruising. We must make patients aware they may be bruised after dissolving.
More inferiorly towards the brow you can see a very large vessel that’s extremely close to the filler. Whether supraorbital or supratrochlear both have direct connections to the ophthalmic artery. So we can see that this filler placement was very much a near hit.
Whilst I dissolve some more I want to share four tips for guided dissolving with you.
Angle your colour box when you scan – an angled colour box is more likely to pick up vascular flow so make sure you set yourself up correctly.
Make sure you have plenty of gel so that this acts as a cushion to prevent tissue compression. Especially in delicate areas like the face applying pressure will skew your accuracy so the more gel you have, the less you’re likely to compress.
I use ultrasound gel beneath a sterile probe cover on which I then apply sterile ultrasound gel. You must make sure your procedure is clean, so you should be covering your ultrasound with an appropriate cover for all ultrasound guided injections to prevent contamination.
Stabilise yourself! You can see there I’ve got my hand rested firmly on the patient’s head, and that’s really important for stability. Don’t be afraid of using parts of your patient’s face as a rest – it will improve your precision immeasurably rather than attempting to hover awkwardly over your patient’s face.
This scan was one hour after hyaluronidase treatment.
The reason I waited an hour for this patient is because she travelled over 5 hours to get to me and I wanted to make sure the filler was gone.
You can see that all those black deposits have now disappeared. After around an hour this is what we expect – that cotton wool appearance we saw in the tear trough in the other case has gone and the filler has pretty well broken up completely.
Here we can once again see the normal layered anatomy of the forehead with skin, subcutaneous fat, frontalis, subfrontalis fascia, loose areolar tissue, bone.
I fixed her. Her complication is resolved.
So what impact do you think this will have had on this patient?
This procedure is seriously impressive. When you are properly trained and can use your ultrasound with ease, this is revolutionary. She will go home happy and I guarantee you – she’ll be a patient for life. What’s more, she’ll refer all of her friends.
Some of you may be handling complications already with ultrasound. For many of you complications might be new. Or ultrasound might be new.
So, how do you go from simple scanning to managing complications?
The best way is to incorporate ultrasound into your daily practice. Make sure you are using ultrasound every day for the simple stuff – recognising anatomy and vascular mapping.
Complications can be terrifying. When patients are upset, injured or litigious, you could very easily get yourself into trouble if you aren’t rehearsed with your skills. You might end up being the last in a long line of practitioners getting sued if it doesn’t turn out well.
So, build your skills gradually. Rome wasn’t built in a day – but it was built.
If you’re starting with complications, choose the everyday ones. Simple guided hyaluronidase in patients who aren’t too concerned, or where misplaced filler was an incidental finding. Lips, and easily identifiable cheek filler is great. This way, you can eliminate unpredictability in high risk procedures by doing low risk treatments with ease.
Always ask for help if you are not sure. Complications can be very stressful for both the patient and for you. A second set of eyes on a case is often a very good thing. Especially when you are learning, a little help in interpreting ultrasound scans can go a long way to solving a complication.
And I can show you to get there.
Right, here comes the exciting part.
As you know at the HUB we create world-class learning experiences so you can be better practitioners and grow your practice.
After almost a year of hard work, instructional design, video editing and research we’ve finally launched an online Ultrasound course which I want everybody here to sign up for.
You can see some of the topics here, there’s quite a lot of content and the course will guarantee you the best start in ultrasound. If you already have ultrasound, you can even scan along with the videos and demonstrations.
You can study at home and once you’ve completed the online accreditation you can come to the HUB and learn with me at our state of the art ultrasound practice.
Our team has designed this course so that you can practice at a high level with your ultrasound device.
You’ll be able to avoid complications, obviously, treat complications, better understand anatomy – this will make you a more precise, better injector. You will become the go-to person for tricky cases and complications – which by the way guys is extremely lucrative. People come from all over Europe to my complications practice and it all started, not with buying an ultrasound machine but learning to use it like a pro.
But the most important benefit of the course is that you will make a name for yourself as a practitioner who takes safety seriously and can treat complications. Complication patients are magical patients. They don’t just tell their friends they refer their entire friendship group, families and network to your practice. So it’s this magnificent practice builder.
You guys are at the forefront of aesthetic medicine, interested in the most exciting development that’s hit the scene in the last decade, and you’re going to be making a huge difference to patient safety by using ultrasound.
So, keep learning, and finding interesting anatomy with ultrasound. Your patients are lucky to have you.
Thank you for your attention today, it’s been a real pleasure speaking to you tonight.
Want to try out our courses before committing? Take advantage of our free trial for a taste of what learning at the HUB is like.
Remarkable Aesthetics Courses
Advanced Facial Ultrasound
Explore more
One-to-One Mentoring
Explore more
Facial Ultrasound
Explore more
Lip Filler
Explore more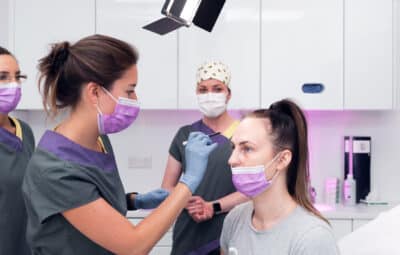
Botox
Explore more